Motivation #
Photography is a passion that generates a significant amount of data. For a side photographer, ensuring the longevity of raw files is a top priority. This article details a practical workflow for using a Storage Box as an object storage solution for big amounts of data.
Unlike consumer cloud services, which limit encryption and retain access to your files, self-hosted workflows give you full control, and ensure long-term ownership and accessibility. Self-hosting on a NAS like Synology is ideal for full control, however, I’ll be using an object storage server instead, but still keeping the setup private and secure through encryption and careful management.
Privacy and Data Ownership Concerns #
Using consumer-grade cloud services like Google Drive, Dropbox, or OneDrive for storing critical data is risky. These platforms often retain access to your data. For instance, while Google Drive employs AES-256 encryption during data transmission and storage, it retains the encryption keys. This means Google can decrypt your files if required, exposing them to potential internal misuse or legal compliance issues. - https://www.docontrol.io/blog/what-is-google-drive-encryption
Most of them, being U.S.-based companies, these services are subject to the CLOUD Act, which allows U.S. law enforcement to access data stored overseas without user consent. This can compromise data privacy, especially for users outside the U.S. - https://en.wikipedia.org/wiki/CLOUD_Act
Even when client-side encryption is available, the management of encryption keys often remains with the service provider.
The Storage Solution #
I chose a 1 TB Hetzner Storage Box for this task. Unlike consumer-grade cloud services, Hetzner offers a straightforward and simple solution for archival purposes. An important feature of this service is the support for multiple access protocols like SFTP and WebDAV.
WebDAV (Web Distributed Authoring and Versioning) is a set of extensions to the HTTP protocol that allows for collaborative editing and file management on remote web servers. - https://en.wikipedia.org/wiki/WebDAV
Why Webdav #
Webdav is widely supported across platforms and integrates easily with tools like Rclone, which I will be also using. For this workflow, its primary advantage is simplicity and reliability when transferring large files. It lets me manage remote files as if they were local without needing complex configuration. However, compared to SFTP, WebDAV can be slower for transferring many small files, and its HTTP-based design adds some overhead. However, in my workflow, this is negligible because I consolidate everything into a single .tar archive before upload.
I have found little use for a mounted SMB (Server Message Block) drive. Since the goal is archival, not frequent access, a persistent network mount adds unnecessary overhead. Most interactions with the files happen locally before encryption and upload.
The Web Interface #
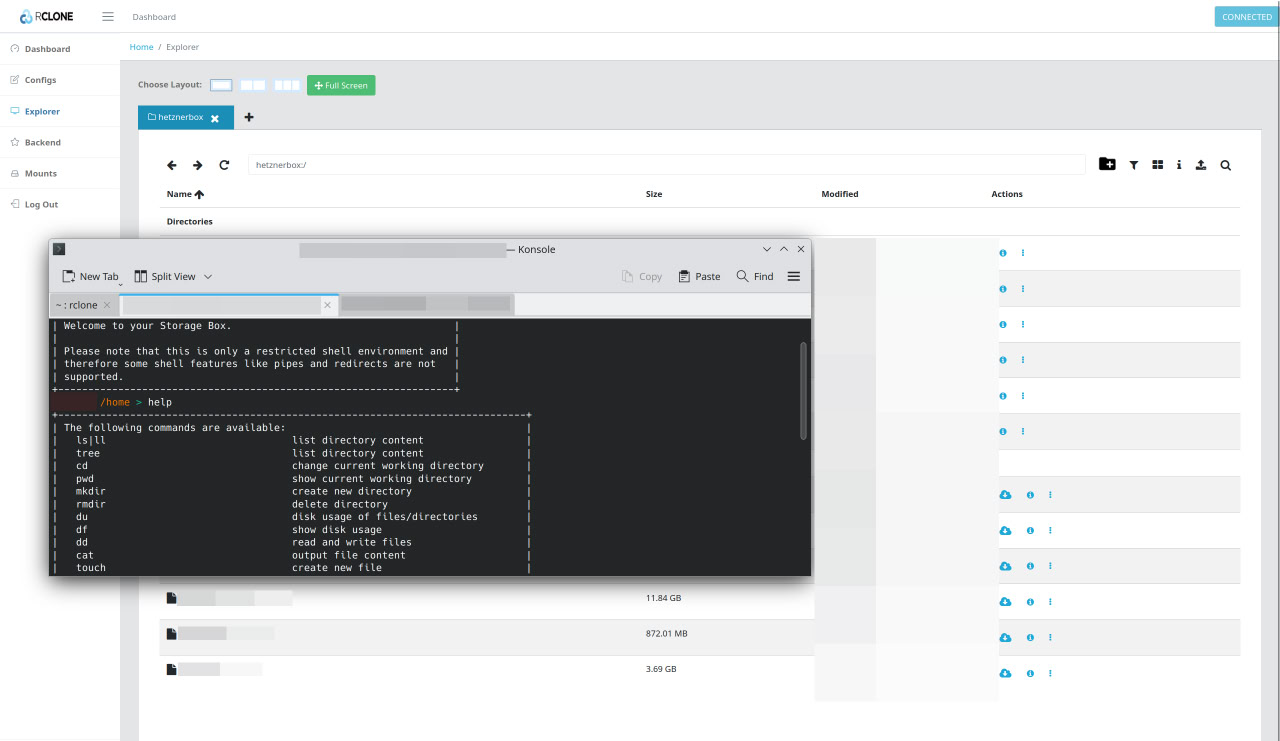
The Hetzner Storage Box doesn’t come with a user-friendly, pre-built web interface for managing your files in the way that consumer services like Google Drive or Dropbox do. With those services, the web panel is the primary way to interact with your data. You can upload, download, and organize files directly in your browser. This is not the case with a basic object storage service like Hetzner’s.
Rclone is an open-source command-line program that supports over 70 different cloud storage providers, including S3 object storage and various file transfer protocols like SFTP and WebDAV. While Rclone is primarily a command-line tool, it has an experimental built-in web-based GUI that you can launch with a simple command: rclone rcd --rc-web-gui.
This command starts a local web server on your machine that provides a graphical interface to interact with your remote storage. It’s essentially a private, secure dashboard that you can use to browse your Storage Box, see transfer progress, and perform file management tasks without needing to type out complex commands.
Make It Easy to Use #
Running the Rclone GUI with rclone rcd --rc-web-gui is straightforward, but it’s not ideal for long term use, as the process terminates when you close the terminal. To make it a persistent service that’s always available, we can create a systemd service and expose it through a local domain using nginx as a reverse proxy. https://github.com/rclone/rclone
Systemd Service #
First, create a systemd service file to manage the Rclone process. This ensures it starts automatically on boot and can be managed easily.
Create a file at /etc/systemd/system/rclone-gui.service and add:
Description=Rclone Web GUI
After=network-online.target

[Service]
Type=simple
User=USER
ExecStart=/usr/bin/rclone rcd \
   --rc-web-gui \
   --config=/home/USER/.config/rclone/RCLONEREMOTE.conf \
   --rc-user=RCLONEUSER \
   --rc-pass=RCLONEPASS
Restart=on-failure
RestartSec=5

[Install]
WantedBy=multi-user.target
Replace the uppercase constants with relevant ones for your system.
sudo systemctl daemon-reload
sudo systemctl enable rclone-gui.service
sudo systemctl start rclone-gui.service
Map the Domain #
To access the GUI from a friendly URL like cloud.local, you can map this domain to your local machine by editing the /etc/hosts file.
Open the file with sudo nano /etc/hosts and add the following line:
127.0.0.1 cloud.local
Mkcert SSL #
To avoid “Not Secure” warnings in your browser and ensure all traffic is encrypted, you can use mkcert to create a trusted local SSL certificate.
First, install mkcert:
sudo apt install libnss3-tools
mkcert cloud.local
This will create cloud.local.pem and cloud.local-key.pem files in your current directory. Move them to a secure location.
Configure NGINX reverse proxy #
We will use nginx to forward requests from cloud.local to the Rclone service running on 127.0.0.1:5572. This allows us to handle the connection through a standard web server and add a local SSL certificate for security.
Create an nginx configuration file at /etc/nginx/sites-available/cloud.local with this content:
server {
   listen 443 ssl;
   server_name cloud.local;

   ssl_certificate /PATH/TO/cloud.local.pem;
   ssl_certificate_key /PATH/TO/cloud.local-key.pem;

   location / {
       proxy_pass http://127.0.0.1:5572;
       proxy_set_header Host $host;
       proxy_set_header X-Real-IP $remote_addr;
       proxy_set_header X-Forwarded-For $proxy_add_x_forwarded_for;
       proxy_set_header X-Forwarded-Proto $scheme;
   }
}

server {
   listen 80;
   server_name cloud.local;
   return 301 https://$server_name$request_uri;
}
Check nginx configuration and start:
sudo ln -s /etc/nginx/sites-available/cloud.local /etc/nginx/sites-enabled/
sudo nginx -t
sudo systemctl restart nginx
The Archival Workflow #
The workflow is designed to be efficient and secure so that the cold copy of the original RAW files is always available.
Edit and Structure #
For my photos, I use Darktable as my RAW editor because it provides a fully non-destructive workflow, is open-source, lightweight, and fully non-destructive. It also has pretty good CR3 support, and a powerful set of color correction and export tools. It allows processing RAW while preserving the originals for long-term archival, along side with the xmp generated files.
Edited images are moved into a separate folder. JPEGs are discarded to save storage space, retaining only the RAW files, which are the true long-term assets. Clear folder separation simplifies future retrieval and ensures that no edits accidentally overwrite originals.
Encryption and Archival #
Before uploading, files are encrypted using Cryptomator. This protects the files from unauthorized access and ensures that even if the storage is compromised, the data remains secure. After encryption, the files are consolidated into a single .tar archive (tar -cvf). This is very important, because uploading thousands of small files individually would be inefficient and quite possibly could cause errors. One large archive maximizes transfer speed and reduces protocol overhead.
Keep Backups #
Relying just on one Storage Box is not 100% secure. It is pretty reliable, but having only one copy introduces risk. For better redundancy, local copies, or additional remote storage should be maintained. See the 3-2-1 rule:
- Maintain at least three copies of your data, including the original data and two backups.
- Store these copies on two different types of media, such as a local server and a cloud service, or a local drive and a NAS device.
- Keep at least one of your backup copies in a separate physical or cloud location.
Use for Anything #
Although this example focuses on photography, the same encryption-and-archive workflow can be applied to any type of important data like: personal documents, financial records, source code, project repositories, research data, video footage or audio recordings. Pretty much any collection of files where long-term retention and security are critical
Get Involved #
I think knowledge should be shared and discussions encouraged. So, don’t hesitate to ask questions, or suggest topics you’d like me to cover in future posts.
Stay Connected #
You can contact me at ion.miron@tutanota.com